
How to Use Semi Cured Gel Nails
You’ve stumbled upon ohora semi cured gel nails, and you are loving what you’re seeing. Now, you might be asking yourself the question, “How do I use semi cured gel nails?” We’re here today to answer this question and give you an in-depth step-by-step guide on how to use semi cured gel nails. In no time at all, you’ll have the perfect at-home manicure. Now, let’s jump right into it!
Choose Your Nail Design
The first step (and one of the most fun!) is to choose your nail design. Ohora has dozens of different nail designs. There’s no doubt that you will find a color and design that matches your personality and style perfectly. Here are a couple of semi cured gel nail kit suggestions:
N Sparkling

The unique combination of colors in the N Sparkling nail kit makes it the perfect manicure for the warmer summer months. The contrast of the yellow and mint colors as well as the subtle sparkle are gorgeous. Everyone will be complimenting your manicure!
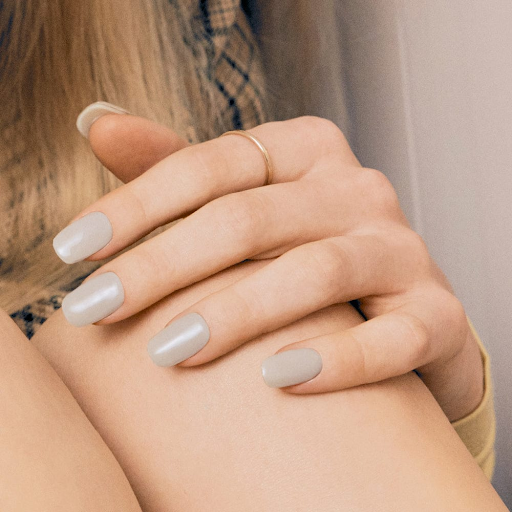
N Cream Paper
If you have a straightforward, no-nonsense type of personality, then this semi cured gel nail kit is just for you! The solid cream gray color goes with everything and highlights the beauty of simple manicures. You can’t go wrong with N Cream Paper.
N Beige Box

N Beige Box is a jaw-dropper! If you’re looking for a nail design that is funky and retro but still has some simple elements, then you’re not going to want to miss N Beige Box. The navy and beige color combination as well as the gold foil accents are stunning. This is a unique and beautiful manicure that will have all your friends asking about them.
Prep Your Nails and Hands
Once you choose a nail design (or two or ten!), it’s time to start getting your nails and hands prepared for the semi cured gel manicure process. These steps are important for ensuring a flawless manicure! First and foremost, you’ll need to wash your hands. This gets all of the grease that might hinder the manicure process off your hands and nails. Secondly, file down your nails to the length of your choosing. This helps the nails to be both strong and smooth. If you need to at this point, you can also push down your cuticles using the wooden stick provided in your ohora semi cured gel nail kit. Thirdly, make sure that your nails are clean and that there is no dirt hiding under the tips of your nails! Good hygiene is key here, and doing a quick clean-up on your nails will save you the trouble of cleaning them afterward.
Peel and Apply
Now that you’ve picked your nail design and prepped your nails, you can move on to the actual application of the semi cured gel nails. First, gently peel off a gel nail from the sheet and press it onto your nail. Each sheet comes with a bunch of different sizes, so if the specific nail you chose on the first try doesn’t fit just right, you can take it off and try another without having to worry about wasting them! Each kit comes with a total of 30 gel nails in 15 different sizes. Then, press down firmly on the gel nail to attach it to your own nail. They’re that easy to apply!
Trim and File
The next step is to trim and file your semi cured gel nails. Get out your handy-dandy pair of nail clippers, and clip off any excess length on the gel nail. This can be a rough trim; it doesn’t have to fit the tip of your nail perfectly yet. That is what the nail file is for. After trimming the excess length, use the nail file included in your ohora semi cured gel nail kit to file the gel nails down to the perfect length and shape. Some people have rounder nails, and others have more square-shaped nails. No matter what shape your nails are, semi cured gel nails are sure to fit because of how personalizable they are, thanks to the magic of nail clippers and files.
Set up Gel Lamp and Cure
This is the portion in which your semi cured gel nails become fully cured. The first step is to set up your ohora Gel Lamp. All you have to do is plug it into a device with a USB port, such as your laptop, and press the button on the lamp to set the curing time. The amount of time that your nails need to be cured will depend on the specific nail kit you choose. Thicker gel nails will probably need 60 seconds of curing time, while simple and thinner nails might need closer to 45 seconds. This will be explained in the instructions that come with your nail kit, so no need to memorize it now. Then, following the instruction manual, you will place your gel nails under the lamp for the full extent of the curing time. This fully hardens the nails, making them feel like a gel manicure
Show Off Your Gel Nails

Your manicure is complete, and now it’s time to show off those beautiful nails! A fun idea is to take some cute aesthetic photos with them on. Maybe add a color-coordinating prop to make the photo really aesthetic. The eye-catching designs of ohora semi cured gel nails make them totally Instagram-worthy. Enjoy having the flawless nails of your dreams!